Weatherproof Camera Tips for Australian Conditions
You've just invested in a professional security camera system for your Brisbane home. A few weeks later, a severe summer storm cell rolls through your suburb—the kind we see every year with golf ball-sized hail and torrential rain. The next morning, you check your camera app and find two cameras offline. The footage you needed from last night? Gone.
This scenario plays out across Brisbane every storm season, and it's completely preventable with the right weatherproof camera tips and installation practices.
Australia's climate is uniquely challenging for security cameras. Brisbane homeowners face subtropical humidity, intense UV exposure, summer storms with high winds, and temperatures regularly hitting the high thirties. Without proper weatherproofing, even premium camera systems can fail—exactly when you need them most.
In this guide, you'll discover proven weatherproof camera tips specifically for Australian conditions. We'll cover selecting weather-resistant equipment, proper installation techniques, ongoing maintenance schedules, and storm preparation strategies. Whether you're planning a new installation or protecting an existing system, these practical tips will ensure your cameras perform reliably year-round.
How to Weatherproof Your Security Cameras: 7 Essential Steps
Weatherproofing security cameras requires proper equipment selection and installation techniques to protect against Australian conditions. Here's what actually works:
1. Choose IP66 or IP67-rated cameras designed for outdoor exposure with sealed housings. This isn't optional in Brisbane—it's the minimum you need for our weather.
2. Install protective housings or shrouds over cameras in exposed locations to shield from direct rain. Think of these as raincoats for your cameras.
3. Apply silicone sealant around all cable entry points to prevent water ingress. Water sneaks in through the tiniest gaps, and once it's inside your camera housing, you're looking at replacement.
4. Use weatherproof junction boxes for all outdoor cable connections. Every connection point is a potential failure point in heavy rain.
5. Mount cameras under eaves or overhangs where possible to provide natural weather protection. Let your roofline do some of the heavy lifting.
6. Ensure downward-facing cable runs so water drains away from connections. Gravity works against you if cables run upward into camera housings.
7. Schedule regular maintenance to check seals, clean lenses, and inspect mounting hardware. Set reminders—this isn't the kind of thing you remember to do otherwise.
For Brisbane's subtropical climate, combine these steps with UV-resistant mounting hardware and regular inspections during storm season.

Understanding Australian Weather Challenges for Security Cameras
Brisbane sits in a subtropical zone, which means we get hit with pretty much every weather extreme. Average temperatures swing from mild winters to hot summers, regularly seeing extreme heat.
The humidity is what really kills electronics though. We're sitting at high humidity year-round, jumping even higher during summer. Your cameras are basically living in a sauna for half the year. That moisture works its way into every tiny gap in housings, connectors, and circuit boards.
Then there's the UV exposure. Brisbane's UV index hits extreme levels from spring through autumn. That's the kind of sun that fades your car dashboard and cracks plastic outdoor furniture—and it does the same thing to camera housings and cables over time.
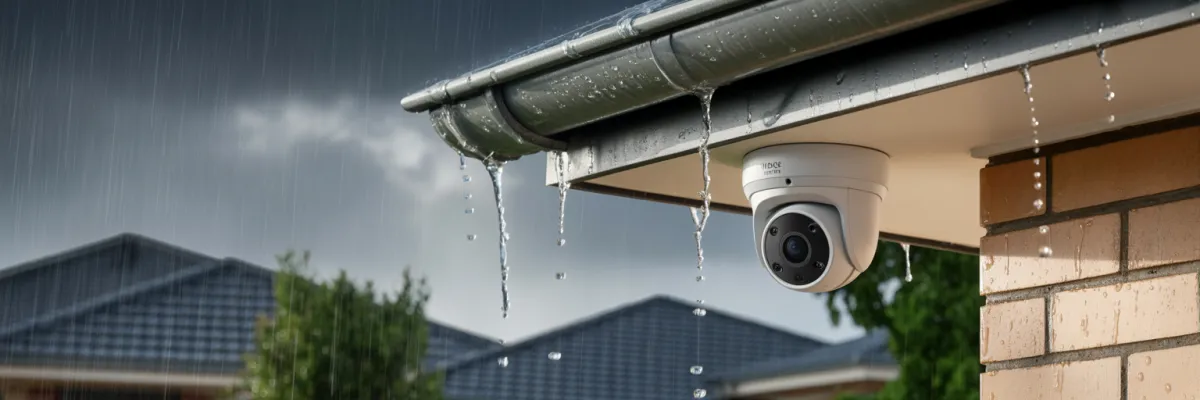
Brisbane experiences more thunderstorm days per year than most Australian capitals. We get severe storm cells with torrential rain, strong winds, and hail that can dent cars. Most rainfall comes down in concentrated bursts during storm season. Your cameras need to handle not just light rain, but absolute deluges where water's coming at them sideways.
The Real Cost of Weather Damage
Camera replacements are expensive. But the financial hit isn't even the worst part. The worst part is losing footage during critical incidents. I've talked to homeowners who had break-ins the same night their cameras failed during a storm. They bought the system specifically for protection, and when they actually needed it, the cameras were offline.
And here's something most people don't realize until it's too late—warranties typically don't cover water damage from improper installation. Even if you bought premium cameras with long warranties, if moisture got in through poor cable sealing or a cracked housing, you're paying out of pocket.
Hail is the big camera killer during storm season. Large hail will crack camera lenses, dent housings, and destroy mounting brackets. Lightning strikes and power surges spike too. Even if lightning doesn't hit your house directly, the electromagnetic pulse from nearby strikes can fry camera electronics.
This is also when we see the most camera failures from water ingress. The combination of driving rain and strong winds forces water into places it normally wouldn't reach. If your cameras are going to fail, it'll probably happen during storm season—which is exactly when you're most likely to need them working.
Choosing Weather-Resistant Camera Equipment
Understanding IP Ratings (Made Simple)
IP stands for "Ingress Protection"—basically how well the camera is sealed against dust and water. The first number is dust protection (we're looking for 6, which means completely dust-tight). The second number is water protection.
Material Quality: What to Look For
Aluminum housings are what you want for long-term durability. They resist corrosion way better than plastic, handle heat better, and don't become brittle from UV exposure.
Plastic housings are fine if they're quality plastic with UV inhibitors. Cheap plastic cameras start showing stress cracks after extended Brisbane sun exposure. The housing goes brittle, cracks appear, and suddenly water's getting inside.
Look for cameras that specifically mention UV-resistant coatings or materials. If the manufacturer doesn't mention UV resistance at all, that's a red flag for Australian conditions.
Gasket quality matters more than people think. The rubber seals between camera housings and mounting plates are what actually keep water out. Quality cameras use multiple gaskets and silicone seals.
Cable jacket materials need to be UV and moisture resistant. Outdoor-rated cables have thicker insulation that won't crack and expose wiring to moisture.
Additional Protective Features
Built-in heaters prevent condensation fog on the lens. Early mornings when humidity is high, cameras without heaters can fog up inside the dome, giving you useless footage until the sun burns it off.
Sunshields and protective housings give your cameras extra coverage beyond their base IP rating. They block direct sun (reducing heat stress) and keep rain from hitting the lens directly.
Vandal-resistant ratings (IK ratings) protect against impact—which is roughly what hail impact looks like. If you're in an area that gets regular hail, vandal-resistant cameras might save you from replacing cracked domes.
Surge protection built into cameras is worth looking for during our lightning-prone storm season. Some cameras have built-in surge arrestors that protect the internal electronics from voltage spikes.

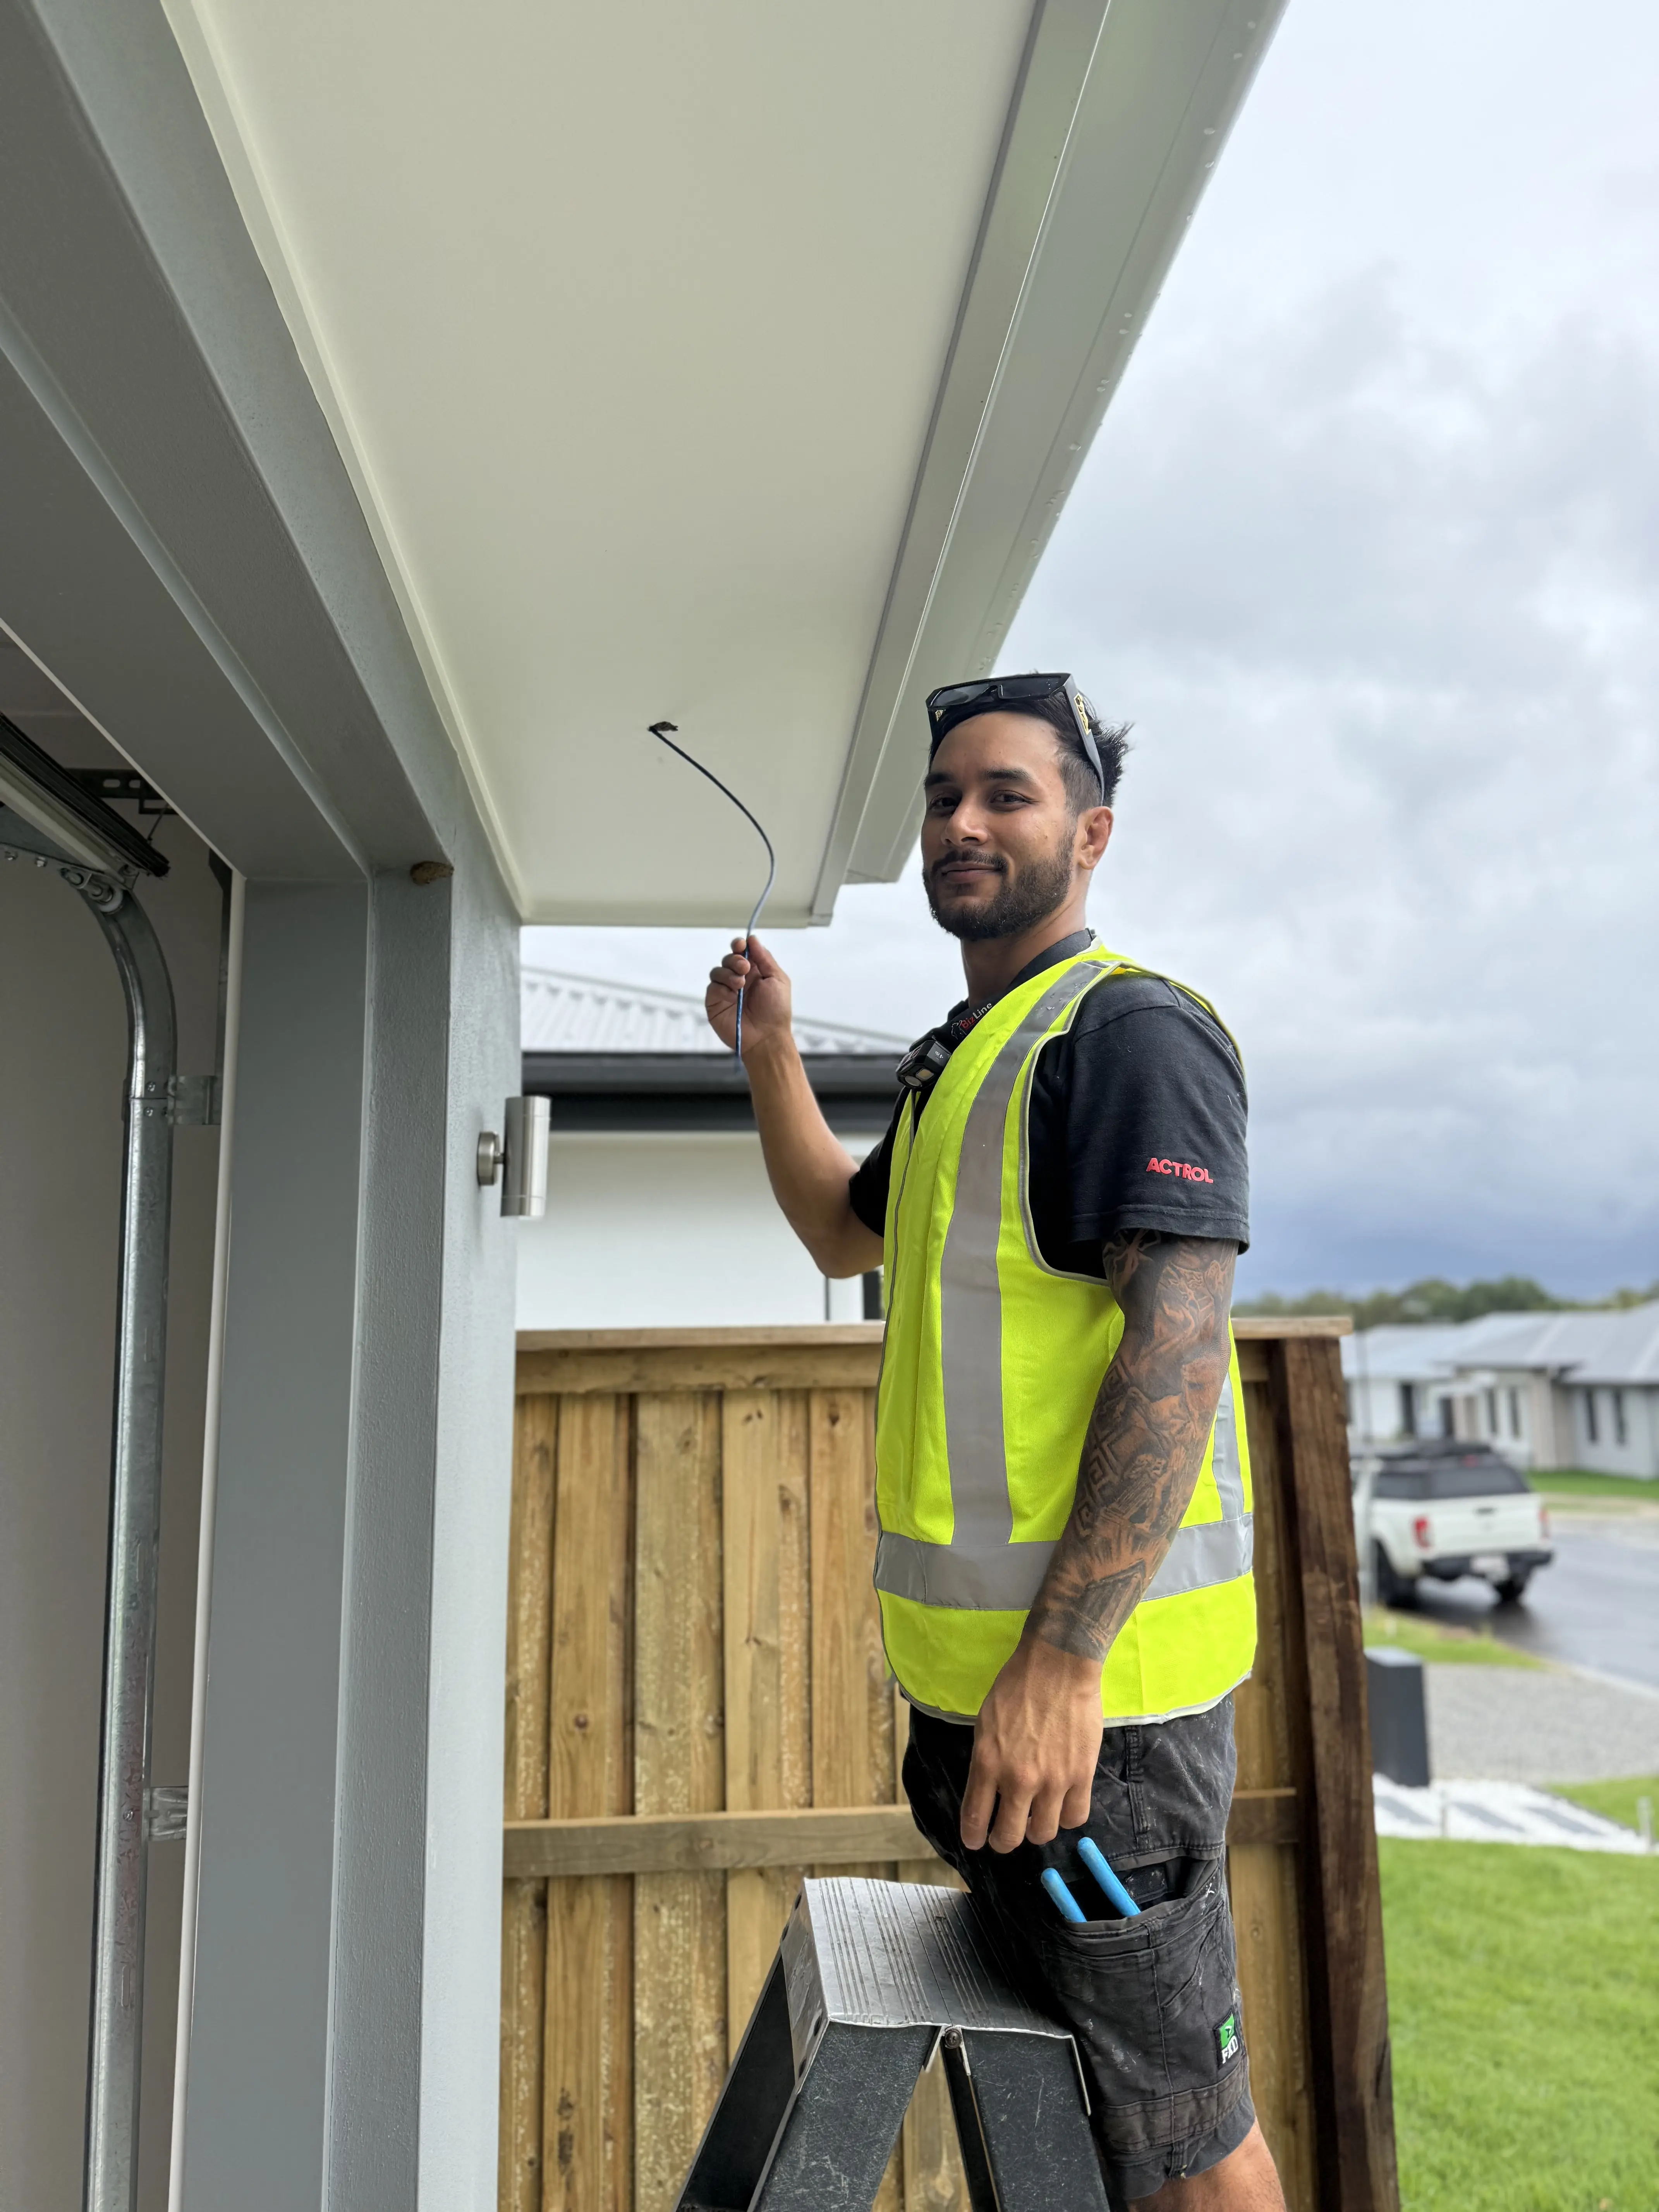
Professional Installation Techniques for Australian Conditions
Strategic Camera Placement for Weather Protection
Where you mount your cameras matters just as much as which cameras you buy. Poor placement can turn a premium IP67 camera into a failed mess.
Mount under eaves wherever possible. Your roofline is free weather protection—use it. Cameras tucked under eaves stay drier, get less direct sun, and face less wind stress.
Avoid direct western sun exposure if you can help it. That afternoon sun is brutal. Cameras mounted on west-facing walls cop the worst of Brisbane's heat, and those housings can get hot enough to fry electronics inside.
Consider wind load on exposed positions. Storms push cameras around. If a mounting position is exposed to prevailing winds, you need heavier-duty mounting hardware and extra reinforcement.
Think about drainage at mounting surfaces. Water needs somewhere to go. Don't mount cameras in spots where water pools against walls or runs down the wall directly over the camera.
Cable Management and Waterproofing
This is where most DIY installations fail.
Drip loops are non-negotiable. Every cable needs a downward loop before it enters the camera housing. Without a drip loop, water runs straight into your camera housing and connection points. With a drip loop, water drips off before reaching the camera.
Silicone sealant is your friend, but you've got to use it properly. After cables enter the camera housing, seal around the entry point with outdoor-rated silicone. Don't use indoor bathroom silicone—it degrades in UV.
Junction boxes for all outdoor connections. Every place where cables connect outside needs to be inside a sealed junction box.
Use conduit for underground runs. Running cables underground? Use PVC electrical conduit. In Brisbane's climate with our soil movement during wet/dry seasons, cables shift and can get damaged. Conduit protects them.
Mounting Hardware Selection
Stainless steel hardware is the standard for Brisbane installations. Regular steel rusts quickly in our humidity. If you're near the coast, stainless is absolutely required. Salt air accelerates rust like crazy.
UV-resistant mounting brackets prevent plastic brackets going brittle and snapping. Metal brackets are better, but if you're using plastic, make sure they're rated for outdoor UV exposure.
Wall anchors need to match your wall type. Using the wrong anchor type means your camera will eventually pull loose from wind stress during storms.
Power and Surge Protection
PoE (Power over Ethernet) simplifies installation because you're running one cable instead of two. During lightning storms, surges can travel through network cables just like power cables. Add an external surge arrestor on the cable run for cameras in really exposed locations.
Battery backup for your NVR or DVR keeps recording during power outages. Storm knocks out power? Your cameras keep working.
Maintenance Schedule for Year-Round Protection
Set reminders on your phone for regular intervals. Seriously—this is one of those "do it now or you'll forget" things.
Check all cable connections. Look for moisture inside junction boxes, corrosion on connections, or cables that've worked loose. If you see green corrosion forming on connections, that's water getting in.
Inspect camera housings for cracks or damage. Small cracks turn into big problems during the next storm. UV damage shows up as discoloration or chalky residue on plastic housings.
Clean lenses and domes with a microfiber cloth and appropriate cleaner. Don't use window cleaner that has ammonia—it can damage anti-reflective coatings on lenses.
Test night vision on each camera after dark. Pull up the app and check that infrared LEDs are working and you're getting clear nighttime images.
Verify motion detection and alerts are still working properly. Walk in front of each camera and make sure you get notifications.
Check mounting hardware tightness. Cameras work loose over time from thermal expansion/contraction and wind movement.
Before Storm Season
Do a thorough system check before storm season kicks off.
Clean the areas around cameras to clear away built-up dirt, mold, and grime from last season.
Reapply silicone sealant where it's degraded. Silicone breaks down after exposure to Brisbane sun and humidity. If sealant looks cracked or has gaps, scrape off the old stuff and reapply fresh outdoor silicone.
Check and tighten all mounting hardware. Make sure every screw is snug—not overtightened, just properly snug.
Test your backup power if you've got a UPS system. Battery backups lose capacity over time.
Review and update firmware if manufacturers have released updates. Do this before storm season, not in the middle of it when you need everything working.
After Major Storms
Check your cameras promptly after major storms.
Visual inspection from ground level first. Look at each camera. Are any hanging loose? Pointing the wrong direction? Obviously cracked or damaged?
Check for water inside housings. If cameras have clear domes, look for condensation or actual water droplets inside. This means seals have failed and water's getting in.
Test each camera's functionality. Pull up live view on every camera and verify it's still working and providing clear images.
Look for new cable damage. High winds can whip cables around, and flying debris can cut or damage cable runs.
Document everything with photos if you find damage. You might need these for warranty claims or insurance.
Don't put off repairs. Damaged cameras get worse fast. Water gets into cracks, corrosion spreads, and what's a minor repair now becomes a major replacement later.
Common Weatherproofing Mistakes
Installation Errors That Void Warranties
Upward-facing cable entries are probably the most common warranty-voiding error. If cables enter the camera housing from below and point upward, water runs straight down the cable into the camera. "Improper installation leading to water ingress" voids most warranties.
Using indoor-rated cables outdoors means the cable jacket breaks down in UV exposure, cracks, and lets moisture into the wiring. Manufacturers can tell indoor cable from outdoor cable, and using the wrong type is considered improper installation.
Skipping junction boxes for outdoor connections means water gets into connection points during rain. These connections corrode and cameras fail.
Over-tightening or under-tightening mounting hardware both cause problems. Over-tight screws crack camera housings. Under-tight mounting lets cameras work loose in wind.
DIY Shortcuts That Create Problems
Skipping the drip loops because they "look ugly" or take extra cable length. Water runs into cameras. Cameras die. It's that simple.
Using cheap mounting hardware from the local hardware store instead of stainless steel hardware. Savings on screws turn into expenses when the rusted-out mount lets your camera fall off the wall during a storm.
Not sealing cable entry points properly because "the rubber grommet looks pretty tight." Without silicone sealant, water works its way past the grommet during heavy rain.
Mounting cameras in convenient spots rather than optimal spots. Convenience during installation creates problems during operation.
Trusting that "weatherproof" means "no maintenance required." Even professional installations need regular checks.
Maintenance Neglect Issues
Letting spider webs accumulate around cameras seems harmless, but spiders build webs across lenses (blocking your view) and sometimes inside housings through tiny gaps.
Ignoring degraded silicone sealant means water eventually finds its way inside. Check it regularly, replace it when needed.
Not cleaning lenses means you're running cameras with progressively worse image quality.
Forgetting to test cameras regularly means you discover failures when you actually need footage.
Skipping firmware updates leaves cameras vulnerable to bugs and security issues.

Protecting Your Investment in Brisbane's Challenging Climate
Brisbane's subtropical weather creates genuine challenges for security camera systems. Between intense UV exposure, summer storms, high humidity, and extreme temperatures, cameras face more stress here than in most Australian cities.
But here's what experience has taught me—the systems that fail aren't usually failing because Brisbane weather is too harsh for security cameras. They're failing because of poor installation choices, inadequate weatherproofing, or maintenance neglect.
The weatherproof camera tips we've covered aren't complicated. Proper IP ratings, strategic mounting positions, sealed cable connections, quality mounting hardware, and regular maintenance checks. None of this requires advanced technical knowledge. It just requires doing it properly from the start.
I've watched DIY installations fail and professional installations still working perfectly—in the same areas, facing the same weather. The difference isn't luck. It's attention to those small details that prevent water ingress, reduce UV damage, and ensure connections stay secure through hundreds of storm cycles.
Your security cameras are protecting your family and your home. They need to work when package thieves show up, when someone's checking if your house is empty, when storms knock out power and opportunistic break-ins spike. Cameras offline during those critical moments make your entire security investment worthless.
Brisbane weather is demanding, but it's not impossible. Cameras properly rated, professionally installed, and regularly maintained will survive our climate and provide reliable security.
Get Your Free Security Camera Assessment
Not sure if your current cameras are properly weatherproofed for Brisbane conditions? Wondering which system and installation approach is right for your specific property?
We offer free, no-obligation home security assessments. A qualified technician visits your property, assesses your specific weather exposure, recommends appropriate camera positions and weatherproofing approaches, and provides transparent information for professional installation.
Contact us to book your free assessment. Don't wait until the next storm season to discover your cameras aren't properly protected. Get ahead of Brisbane weather with professional installation and weatherproofing that's built to last.