How to Install Security Cameras at Home: 7 Easy Steps
Ever wondered if you could actually install security cameras at home yourself? Thousands of homeowners are taking the DIY route. Some nail it and end up with professional-looking systems. Others end up with cameras pointing at the sky, cables dangling like spaghetti, and systems that fail during the first storm.
Installing security cameras at home doesn't require an electrician's license or advanced tech skills. With the right equipment, decent planning, and a realistic view of what you're getting into, most homeowners can complete a solid installation. Whether you're monitoring package deliveries, watching the kids come home from school, or just wanting peace of mind—this guide's got you covered.
Before You Install – Essential Planning Steps
The planning you do before drilling separates systems that work from ones that don't.
Assess Your Home's Security Vulnerabilities
Walk around your property like you're planning to break in. Where would you go if you wanted to get in unseen? Most people think "front door" but burglars know everyone can see the front door. They're going around the side where fences meet, or through back gates.
Common entry points you need to cover:
Side gates – Entry point number one. That path down your side needs a camera
Back doors and sliding doors – Hidden from street, easy to force
Driveways – Monitor cars and catch package thieves
Front entrance – Package deliveries and door knockers
Garage and ground-level windows – Common targets
Valuable storage areas – Where bikes, tools are kept
The side of your house is probably your biggest vulnerability. That narrow path between fences? Perfect cover for someone avoiding the street. Prioritize these hidden areas first.
Choose Between Wired vs Wireless Security Cameras
Wireless cameras are easier for DIY—no running cables through walls. But they're only as reliable as your internet connection.
Wired cameras (PoE—Power over Ethernet) are more work but once installed, they just work. No WiFi dropouts, no battery changes. The downside? You're running cables and drilling holes.
Single-story home with outdoor cameras and solid WiFi? Wireless makes sense. Two-story place wanting permanent installation? Wired is worth the effort.
Hybrid approach: wired cameras for permanent spots (front door, driveway, back door) and wireless for areas you might adjust later.
Create Your Home Security Camera Layout Plan
Get paper and draw your property—just a rough sketch showing house, boundaries, gates, doors, windows. Mark where cameras should go. Draw coverage zones (roughly 90-110 degrees for most cameras).
Planning considerations:
Height – 2.5-3 meters high for clear face shots
Coverage overlap – No gaps between camera zones
Lighting – Avoid pointing directly into sunrise or sunset
Power and WiFi – Check access and signal strength
Cable routes – Plan runs for wired systems
This planning prevents buying wrong equipment or discovering you need more cameras after starting installation.

What You Need to Install Security Cameras at Home
Required Tools and Equipment
Essential tools: □ Power drill (hammer drill for brick) □ Screwdriver set □ Ladder □ Cable clips and staples □ Level □ Pencil □ Safety glasses and dust mask
For wired installations add: □ Cable tester □ Crimping tool □ Cat5e/Cat6 ethernet cable □ Cable conduit □ Silicone sealant □ Junction boxes
Choosing the Right Security Camera System
Resolution:
1080p (2MP) – Minimum for identifying faces
2K (4MP) – Sweet spot for most homes
4K (8MP) – For license plate reading on driveways
Don't need 4K everywhere—it uses massive storage. Use strategically where detail matters.
Weatherproofing: IP65 minimum, IP66 better. Metal housings last longer than plastic.
Storage:
Local (DVR/NVR) – No monthly fees, works without internet
Cloud – Access anywhere, monthly subscription required
Most DIY installations use local storage to avoid ongoing fees. Hide the recorder somewhere not obvious.
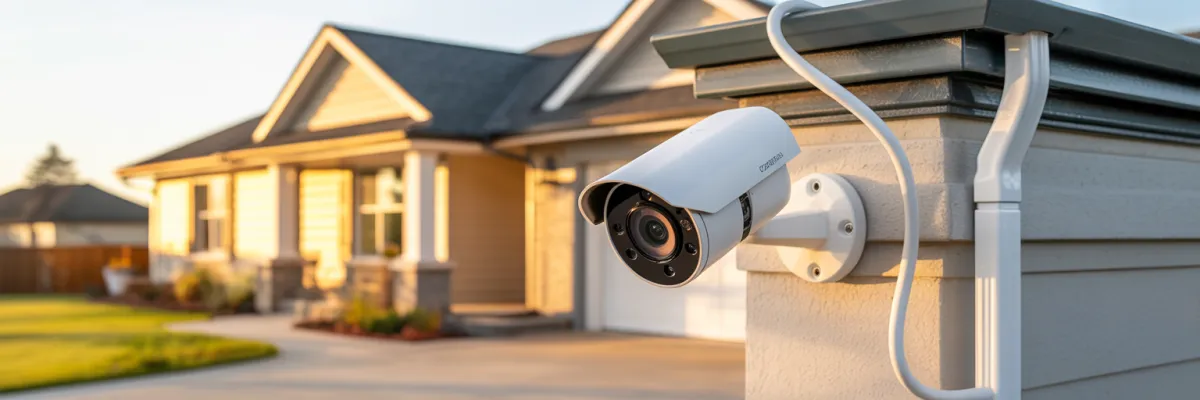
Step 1 – Plan Your Camera Placement for Maximum Coverage
Understanding Camera Coverage Zones
Most cameras cover 90-110 degrees. Each camera creates a cone-shaped viewing area. A camera mounted 3 meters high has a blind spot in the first meter below it.
Sweet spot: Mount 2.5-3 meters high, angled down 15-30 degrees for face-level viewing.
Priority Placement Zones
Camera 1 – Front entrance: Mount above and to the side of door for clear face shots. Not directly above—hats block faces.
Camera 2 – Driveway: High enough to avoid car blocking, angled for license plates. Need 4K for plate reading.
Camera 3 – Side gate: Front corner of house looking down side path. Catch people before they're halfway down.
Camera 4 – Back door: Cover door and back yard. Sliding doors are easy to force.
Common Mistakes
Mistake 1: Pointing at reflective surfaces creates night glare
Mistake 2: Not testing WiFi range before mounting wireless cameras
Mistake 3: Wrong height—too high shows heads, too low is reachable
Mistake 4: Mounting where you can't reach for cleaning
Mistake 5: Gaps between camera coverage zones
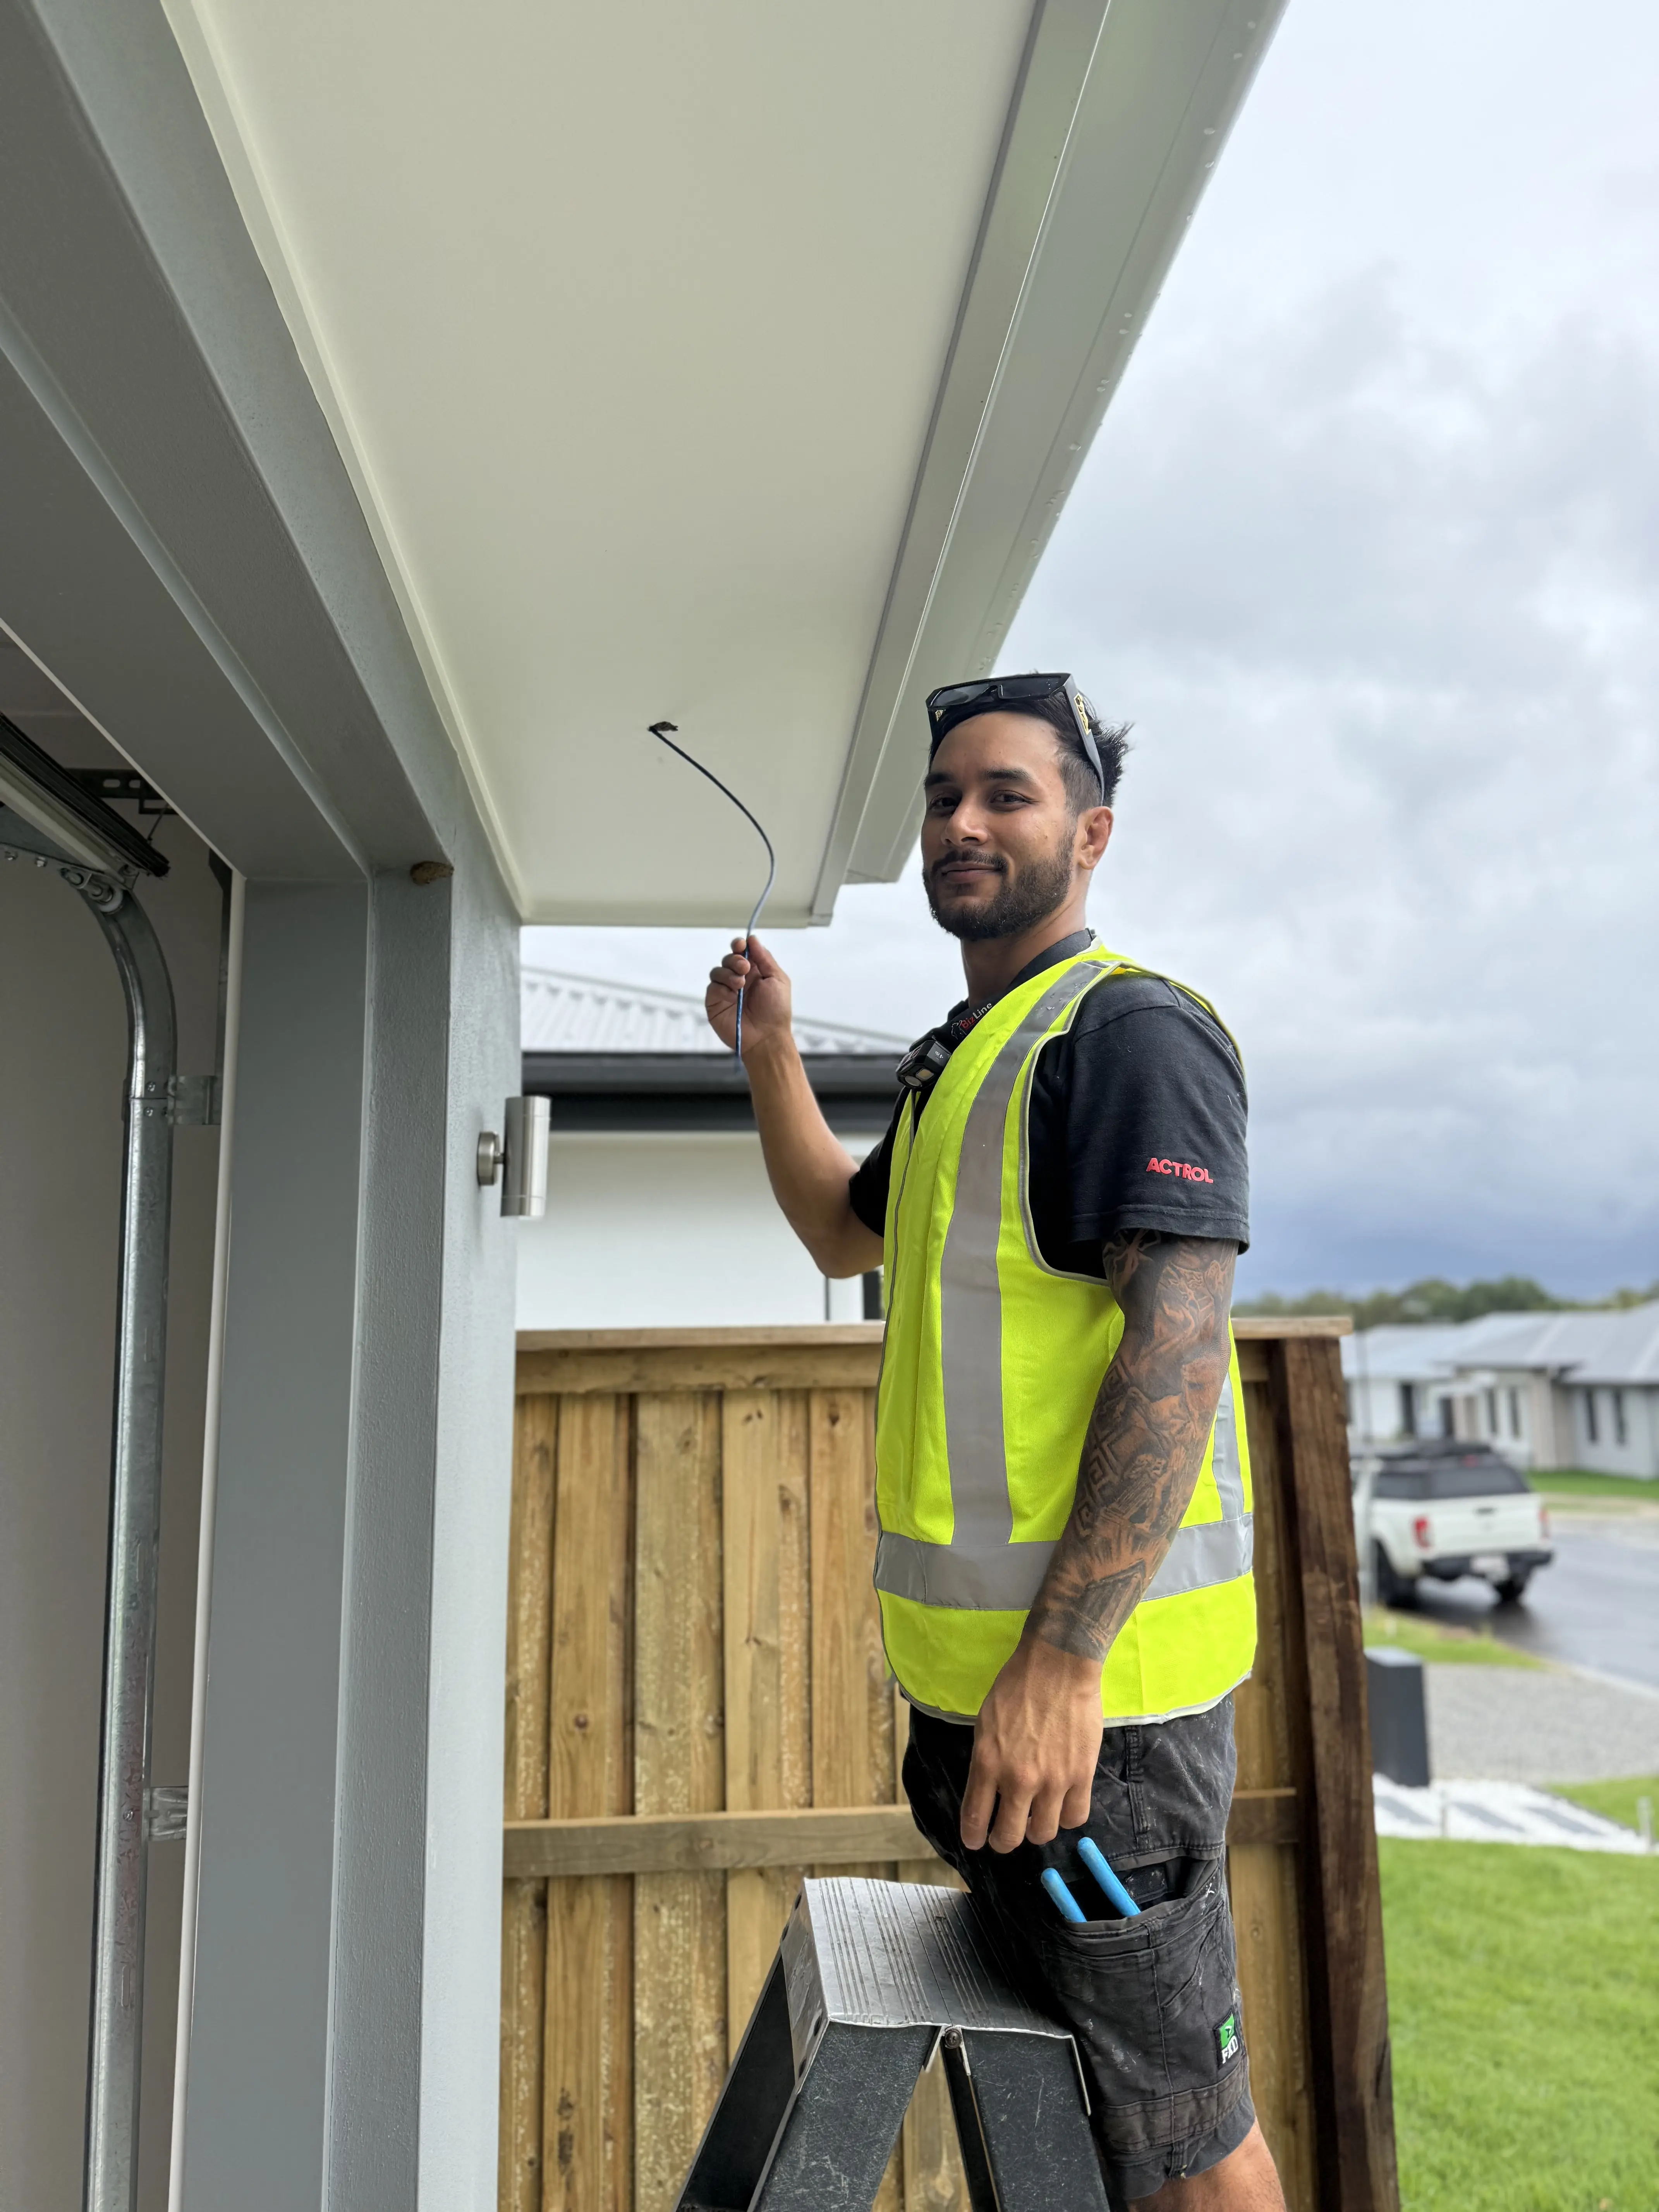
Step 2 – Mount and Position Your Cameras
Drill and Mount Camera Brackets
Hold bracket where you want it. Use your level. Mark screw holes with pencil. Double-check—holes in brick are permanent.
For brick: Safety glasses on, hammer drill setting, start slow then full speed. Brick dust goes everywhere—have someone vacuum near the drill.
Insert masonry anchors flush with wall. Screw bracket on. Tighten properly but don't over-do it.
Weatherproofing Cable Entry Points
Drill cable entry holes angling downward from outside to inside. Water drips off outside, not inside walls.
After threading cable:
Cable gland or rubber grommet at entry
Seal with outdoor silicone
Create "drip loop"—cable dips before entering hole
Test Angles Before Finalizing
Attach camera to bracket loosely
Mount bracket
Power up camera
Check view on phone
Walk through coverage area
Adjust as needed
Then tighten fully
What looks good from the ladder often doesn't give the view you need.
Step 3 – Run and Conceal Your Camera Cables (Wired Systems)
Running Cables Through Roof Spaces
Before going up: □ Wait for cooler afternoon temperatures □ Wear long sleeves (insulation is itchy) □ Take torch and phone □ Mark camera positions
Start from recorder location. Run cables up into roof, routing along ceiling joists, cable-tied every meter, keeping away from electrical cables.
External Cable Management
Surface-mount conduit: PVC channeling on walls. Plan route following rooflines and downpipes. Cut to length, stick to wall, lay cables inside.
Existing features: Run cables along downpipes, fence lines, or under eaves. UV-resistant cable clips every 30-40cm.
Cable Testing and Labeling
Test every cable with cable tester before connecting. Find problems now, not later.
Label both ends of every cable: "Front Door Camera", "Driveway Camera", etc. Future you will be grateful.
Step 4 – Connect Your Security Camera System
Connecting Wired PoE Cameras
Plug ethernet cable into camera port (you'll hear a click). Protect outdoor connections inside junction boxes.
At recorder end, plug each camera cable into NVR port. System automatically detects and displays cameras.
Setting Up Wireless Cameras
Process varies by brand but generally:
Download camera app
Power up camera
Camera creates temporary WiFi network
Connect phone to that network
Enter your home WiFi details in app
Camera connects to home WiFi
Test WiFi signal strength at each location first. Weak signal means constant disconnections.
Installing Camera Apps
Download system app, create account, scan QR code or enter serial number.
Set up additional user accounts so partner can access cameras too without sharing passwords.
Initial Configuration
Set correct time and date. Set your timezone.
Recording: Continuous recording for critical cameras (front door, driveway, side gates). Motion detection for less critical spots.
Security: Change default passwords immediately. Use strong passwords. Save them securely.
Step 5 – Configure Motion Detection and Recording Settings
Setting Motion Detection Zones
Define specific areas that trigger detection. Areas outside zones get ignored.
Example: Driveway camera seeing the street triggers alerts for every passing car. Instead, create detection zone covering only your driveway—not the street.
Adjusting Sensitivity
High sensitivity: Triggers easily, catches small movements, more false alerts
Low sensitivity: Requires significant movement, might miss activity, fewer false alerts
Use higher sensitivity for entry points. Lower sensitivity near trees or bushes.
Managing Notifications
Critical cameras: Push notifications enabled, custom alert tones
Medium priority: Notifications during certain hours only
Low priority: Notifications disabled, check footage manually
Schedule notification times so alerts don't wake you overnight.
Step 6 – Set Up Remote Access and Mobile Viewing
Setting Up Cloud Remote Access
Most modern systems use cloud connection. Your cameras connect to manufacturer's cloud, your phone app connects to same cloud.
Setup steps:
Create account in app
Add device by scanning QR code or entering serial number
Enable cloud connection in recorder settings
Verify connection in app
Test using mobile data away from home
If cameras appear on mobile data, remote access works.
Optimizing Mobile Settings
Video quality affects data usage. Set default to medium quality. Switch to high only when you need detail.
Multiple Users
Create separate accounts with different permissions:
Admin (you): Full control
User (partner): View, playback, notifications
Guest: Limited temporary access
Each account can have different notification preferences.

Step 7 – Test Your System and Troubleshoot Issues
System Testing Checklist
□ All cameras showing live feeds
□ Recording actually happening (check playback)
□ Night vision switches properly after dark
□ Motion detection triggers when you walk through zones
□ Remote access works on mobile data away from home
□ Date and time stamps correct
Testing Scenarios
Package delivery: Can you clearly identify the delivery person?
Kids arriving: Can verify they're inside?
Front door visitor: Clear notification and face visible?
Nighttime: Night vision captures clearly in darkness?
Driveway: Can read vehicle license plates?
Common Issues and Fixes
Blurry image: Remove protective film, clean lens, adjust focus
Nothing at night: Enable IR, reposition away from glass, check IR LEDs
Constant false alerts: Lower sensitivity, redraw detection zones
Choppy footage: Increase frame rate, check cables, test hard drive
Cameras offline: Check connections, test WiFi strength, try different port
When to Call a Professional
Call a pro if you've troubleshooted for hours with no progress, cameras won't connect at all, or you need complex cable runs through difficult spaces.
Conclusion
You now understand how to install security cameras at home—from planning placement to testing the final system. It's not as complicated as it seems when broken into steps.
Start with proper planning. Don't rush to buy equipment until you've walked your property and created a layout plan. Take your time with installation—better to spend extra time getting it right.
Your home will be more secure. You'll sleep better knowing you can check what's happening from anywhere. Your kids will be safer coming home after school. Package thieves will find easier targets. And if something happens, you'll have the footage you need.
Now stop overthinking it and get those cameras installed.